Summary
How to move a Commence RM server database from one PC to another without re-enrolling all the clients?
More Information
Steps for moving a Commence RM server database from one PC to another. These steps assume the user limit is not decreasing.
Note: Prior to performing the steps below, contact Commence Technical Support at 732-380-0777 or techsupport@commence.com to notify us that the Commence Server will be re-activated at a new location. Without notifying Commence Corporation of this move, the license key and activation will fail.
Step 1: Backup the Commence Server DATA folder
Step 2: Backup the Commence Server WGFILES7 folder
- Determine the location of your "Application Data directory" in Commence by selecting Help - System Information - Directory Information.
- Take note of this directory then close the Commence server database so it does not sync with any more users.
- Open the "Application Data directory" in Windows Explorer. Copy the WGFiles7 folder to a safe location, such as your Desktop.

Step 3: Install the Commence Server and License on the new PC
- Run Setup.exe and choose "Network Install" to install the Commence Server.
- After the installation, enter the license upgrade key. This step is required even if your user limit has not changed.
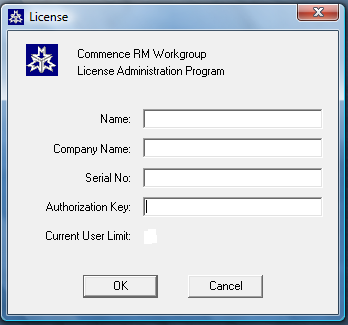
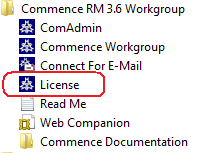
Note: If you are not prompted, run the License program manually from the Start menu. This is found under All Programs - Commence RM Workgroup - License
Step 4: Restore the WGFILES7 folder onto the new PC
-
Locate the Application Data directory on the new PC and rename the installed WGFiles7 directory to WGFiles.default
-
Copy the WGFiles7 directory (created in step 2) to the "Application Data directory" on the new PC.
Step 5: Test to confirm the move was successful
- Make sure Commence is closed, then start ComAdmin (from the Start menu, select All Programs - Commence RM Workgroup - ComAdmin)
- Select Users. Verify your list of users looks correct.
- Select Databases. Confirm the path to the shared database is valid. Edit as needed.
Step 6: Restore the Commence Server DATA folder
- Run Commence. The default Contact Manager database will open.
- Add a new database
- RM 4.0: Click the Commence Application button, then choose Open/Manage Database and click the Add button. Enter a database name and choose a new empty folder.
- RM 3.5/3.6: Select the File menu, then choose Open/Manage Database and click the Add button. Enter a database name and choose a new empty folder.
- Restore the Commence server database.
- While still viewing the Open/Manage Database window, highlight the new database you just added.
- Click the Restore button.
- Select the backup file of the server database created in step 1. This file will typically have an .XFR extension.
Step 7: Start the Commence Server
- With the restore complete, open your Commence Server database.
- Verify the title bar shows "Commence/Server".
- Use the Customize - Workgroup menu command to verify the server communication parameters are still valid for the new environment.
If the communication parameters are also being moved, continue with the workaround steps below.
Workaround
The steps above assume the existing sync directory will continue to be used. Continue with the steps below if you also need to change the location of the folder used to exchange sync files (i.e. shared LAN directory or FTP directory).
- After the server is restored, select Customize -> Workgroup.
- Click Next until you get to the Communications screen. Press the Configure button at the top of the screen to verify the server communications.
- Highlight shared LAN directory and click Edit to change the path.
- Enter the path to a new empty folder on the new PC. Note this folder must be fully accessible to the clients with Read, Write, Create, Delete, and Modify rights.
- Do NOT copy any of the old files from the previous sync directory. These files will be recreated once each client is redirected to use the new spool.
No other files should be moved from the old installation to the new PC.
Applies To
- Commence RM 3.5
- Commence RM 3.5(a)
- Commence RM 3.5.1
- Commence RM 3.5.2
- Commence RM 3.6
- Commence RM 3.6(b)
- Commence RM 4.0
- Commence RM 4.1